Search This Blog

Blogs of friends

Powered by Blogger.

Followers

Wednesday, April 27, 2011

Lily's Birthday Gifts

For those who might be interested in seeing the things that I made for Lily's birthday, I'm adding a few photos.  You might recognize the ideas as I made them for Charlotte for Christmas.  Thank you, again for the fabulous tutorial from 12 Crafts Till Christmas.  Here's the link to the tutorial and here's the one that I made for Charlotte.  

Baby Doll Bassinet

Doll Diaper Bag with pocket (and lots of junk in the background)

Accessories: Changing pad, wipes case and wipes, taggie blanket, and diapers (I'm working on the tutorial on how to make these little doll diapers; they're a hit with Charlotte who was disappointed when I packed them up to give to Lily).

I highly recommend the tutorials for the wipes, bassinet, diaper bag, and changing pad.  I used the diaper tutorial for Charlotte's gift but got a little fancier for Lily's.  I did use a ribbon for the handle of the diaper bag because I'm lazy it looks fancy with the satin ribbon.  The 'taggie' toy that I made has a little bit of the gray towel that I used at Christmas time to make Lily's elephant towel.  I just made mine without a pattern but I'm sure there are lots of tutorials out there for this sort of thing.  If it's supposed to be for a human baby, just make the dimensions smaller and voila, it's perfect for baby dolls!  
I hope that Lily enjoys stuff as much as Charlotte does!  It was certainly fun to put it all together!

Tuesday, April 26, 2011

To-do Tuesdays

Charlotte's Easter dress in action.  (Disclaimer: I am not the one who tucked in Alexander's shirt)


Do Peter's laundry for next week.
Finish baby doll diaper tutorial (still without a camera). 
Call to find out when my camera is going to be fixed.
Call all of my friends and ask them to please stop doing their rain dances.
Firm up a house for Disney World.  (We're not going for a long while so don't get your hopes up burglars!) 

I'm completely fed up and done with thunderstorms and severe weather.  Rain in the spring is fine but 3-4 weeks of tornado warnings is just over the top.  Maybe next week will be sunny and perfect.  We can always hope!  Oh, and as for last week, I did get the laundry done (and most of it sorted and put away).  I didn't finish an old project but I did complete a new one; I appliquéd a lollipop on a little pink knit dress that I purchased at a consignment store.  I wanted Charlotte to have a cute dress to wear to her cousin, Lily's 2nd birthday party that had a candy store theme.  I wish I had my camera at the party because Michelle, my sister in law, is so creative. Maybe I'll have her write a guest blog someday (when she's not working or chasing Lily or sleeping or eating or pregnant.  Ah, well, I guess she doesn't have much free time but when she has a little she makes some really cute stuff!

All of the kindergarten classes at Alexander's school put on a musical, The Little Red Hen.  Alexander had a small speaking part as Farmer 16, "And when she got home, it was time to make the tortillas."  He memorized it on his own and delivered his line with confidence and poise.  We were so proud.  Oh, and for those that thought that the little red hen baked bread, keep in mind that the kids at Glendale are learning Spanish so part of the show was in English and part in Spanish. 


Tuesday, April 19, 2011

To-do Tuesdays

Charlotte's Easter Dress
I finished Charlotte's Easter dress!  Hooray!  I think I would be happy if that was the only thing that I did this week.  However, I also finished Lily's birthday present, and went through Charlotte's clothes.  I didn't get to Alexander's yet.  What do you do about changing from winter to summer clothes?  Every time I think it's ok to weed out the warm stuff, we have a chilly day so I feel satisfied that my procrastination has paid off.  However, there must be some rule that organized people go by!  I started the post about my sewing area organization and tried to take some photos but they really were quite terrible taken using my phone so I'm going to wait until my camera returns to finish the post.
Things to do this week:

Wash and pack clothes for our trip to Indiana
Finish one of the sewing projects that has been sitting around for ages
Cook dinner 3 nights (warming up chicken nuggets doesn't count)
Go to bed before midnight at least 4 nights this week (I'm tired and I'm pretty sure it has to do with staying up too late watching HGTV!).

I'm working on my first tutorial blog post.  It's nothing fancy, just reusable babydoll diapers.  If I can get the scanner to work, I'll have a 'pattern' and plenty of cruddy pictures (from my phone) to share.  

Monday, April 18, 2011

Easter is on the way!

Just in case you forgot, Easter is only a week away.  So, you better get your chocolate bunnies and Easter grass and get ready!
Here are a few pictures of the kids at an egg hunt that we went to today.  Alexander was so excited to go and Charlotte had no idea what we were doing...until she got going.  I think Charlotte is an egg hunt natural.  This picture is of her finding one of her first eggs but she filled her entire basket and would have continued if I hadn't stopped her!
Can I complain a little bit? (As if you have a choice.)  Cell phones do not take good pictures.  I want my camera back.  Hurry up fix-it people!  I need my camera!  (Example of bad cell picture below; I wish I had gotten a better picture of Alexander at the hunt.)
Phillips Toy Mart in Bellemeade always has a fancy bunny exibit before the Easter holiday.  We decided to check it out (and purchase a birthday present for a friend).  The bunnies in the exhibit are a little hard to pet since the rails are so tall (for the kids) but we got lucky.  There was a bunny breeder outside the store that had about 25 bunnies available for purchase.  We did not purchase one.  But we did get to pet them and cuddle them.  Peter was at school so I wasn't able to juggle bunnies and photo taking.  Maybe next time.
Stay tuned for a short post with a picture of Charlotte's Easter dress!  It should be done soon!

Tuesday, April 12, 2011

To-do Tuesdays

Well, I'd like to say that I got everything on last week's list accomplished but that would be a lie.  I picked up my sewing machine and used it to make my niece, Lily's birthday presents (photos to come after her birthday party). I did four loads of laundry but only put away one.  Thanks to my loving husband who put away the other three.  Now, I only have about 18 loads to go.  I've made some phone calls and set up a few appointments for people to look at the fence.  Apparently you can't just tell them to drive by and give quotes.  So, hopefully we'll have someone scheduled to power-wash and paint by next Tuesday.  And the kid's clothes...I didn't do it.  I thought about it. A lot.  But...I didn't do it.  This week's list:

Put finishing touches on Lily's birthday presents
Make Charlotte's Easter Dress
Do a blog entry about organizing my sewing area (and finish organizing my sewing area?!)
Organize the kid's clothes
Send my husband subliminal messages about how I would like a Silhouette machine for Mother's Day.

Here's to hoping that we won't have to have any more tea parties in the guest bathroom or the closet under the stairs (can you say, Harry Potter?).  We've had two too many tornado warnings in the last week and that's quite enough for me!

Friday, April 8, 2011

Baked Potato Soup and S'mores Cookies

Ok, so I had to make dinner to take to friends the other night and decided that I would try something different.  I wanted to take something that would be different from the normal poppy seed chicken or lasagna.  So, I made Baked Potato soup.  I used this recipe and it was fabulous!  Peter told me that it was restaurant quality.  Just keep in mind that the soup is NOT low-fat or low-calorie.  I did use light sour cream but I went with the whole milk and used the suggested amount of butter.  One thing I have to say is that the soup really thickens as it cools.  Therefore, if you're taking it to someone and they'll need to warm it up, I would tell them to put it in a saucepan and add a little milk.  Warm it on medium and stir, stir, stir.  Yum.
So my camera is broken.  How frustrating!  I was able to use Matt and Michelle's camera for Alexander's birthday pictures.  Luckily, it's the same brand as mine so it was straightforward.  Unfortunately, they had to go back to Kentucky after the party so I'm left with my cell phone camera.  I didn't get a picture of the soup but the Kitcn website has a great one so just look at theirs for inspiration.

For dessert, I made S'mores Cookies.  I'm sure there are lots of recipes out there for these but I used this one.  I found Peter sneaking a few so I knew they were good.  He doesn't usually give in to sweets temptations.  That's annoying.  I never used like sweets. I was of the 'give me a bag of chips and I'm happy' attitude.  How things change.  Anyhow, I didn't think to take any pictures of the cookies until just now.  We had one left.  So to the left is the lonely little cookie, sitting on my window ledge trying to get enough light since my cell camera has no flash.

Tuesday, April 5, 2011

To-do Tuesdays

Many of the blogs that I follow include a weekly photo or a challenge of some sort.  I decided, however, that I need some motivation to complete items on my to-do list.  I figure if I put a few items online, there will be more pressure to get them done.  Even if you don't ask me if I get them done, I know that there's a possibility someone will ask if I organized the pantry or changed the sheets on my bed and this knowledge will motivate me.

Here is my to-do list for this week:
Pick up my sewing machine from the shop and begin a new sewing project (maybe Charlotte's Easter dress?!)
Go through the kids' dressers and weed out the clothes that they've outgrown.
Do four loads of laundry and put them away right away.
Get quotes on fence powerwashing and painting (if you have any recommendations, I'll take them).

Yes, I know that this isn't a huge list.  There are lots of other things that need to get done but I'm starting small!  Life has a way of getting in the way of accomplishing even the most simple of goals.  Thanks to Natasha from SamsterMommy, a blog that I read on a daily basis, for her to-do list idea!  


Sunday, April 3, 2011

I love Peeps!

peeps1
Easter is on its way and I can't help but get a little excited.  I have always loved Peeps!  The marshmallowy texture, the fine sugar on the outside...what more could one ask for in a treat?  My Dad likes to tease me about trying to put them in the microwave to watch them grow and explode.  I've never actually done that but it could be fun.  Maybe if we ever move out of this house, I could try it in the microwave before we leave; watch out future homeowners!
Anyway, the reason that I'm bringing this up is because I have found so many fabulous Peep inspired crafts that I want to share with you.  I may not get to all of them.  Or any of them.  But, you might have time so you should check them out!

Beth Proudfoot on It is what it is has fun seasonable printables that anyone could use and look like a professional.  Here's a link to her "Sweet Tweets"!

[DSCF5287[8].jpg]A Lemon Squeezy Home has an idea for Peeps t-shirts using a Silhouette Machine or freezer paper stencils.  If anyone wants to donate a Sillhouette Machine to me, I'm happy to give it a good home.  I'll use it weekly and will even share my project ideas with you.  Ah, dreams are nice, aren't they? Anyway, these t-shirts are great because they're a good project for moms of boys.  It's harder to find things to make for boys as they grow up!

Marshmallow Peeps!


What? Seriously, I could make my own Peeps?  That would be totally fabulous!  There are step by step instructions on Instructables.com.  Here's the link! http://www.instructables.com/id/Marshmallow-Peeps/.  And, if you don't like those instructions, here is another idea for making peeps:  http://www.twigandthistle.com/blog/2009/03/diy-marshmallow-peeps/

If you're not into eating the sugary treats but you want to make memories, check out this free pattern for Felt Food Peeps.
[12.jpg]
Have fun hanging out with your Peeps!  (I couldn't resist!)

Volcano cake

Part 3: The Cake


Cake time!!!  My favorite part of the party was the cake.  I have to say that I am pretty proud of how this cake turned out.  Peter even mentioned that it might have been my best cake ever!
Cake baking:  I baked chocolate cake (one bundt cake, two 9 inch rounds, one cake baked in the Classic Batter Bowl from Pampered Chef and one small cake baked in the Small Batter Bowl.  I let the cakes cool and then stacked them in this order: Round, Round, Bundt, Classic Batter Bowl, Small batter bowl.
Buttercream icing:  I iced in between each layer with homemade buttercream icing.  Yum, buttercream.   (My buttercream icing recipe is simple:  2 sticks butter that are room temperature--leave them out all day or overnight if you can.  Cream the butter using a mixer.  Gradually add 4 cups of sifted powdered sugar.  Add 1 teaspoon of vanilla--I sometimes add a little more because I like it.  Then, add 2-3 Tablespoons until you reach the desired consistency.)  After putting all the cakes together, I used a large bread knife to shave the sides of the cake to be a little more volcano shaped.  
Fondant:  Then, I rolled out the fondant (that I purchased from Michael's).  I hadn't ever used fondant so I didn't want to make my own for fear that I'd do it wrong and then have to ice the entire cake.  It would have required A LOT of icing.  After rolling, which takes a lot of muscle, I picked up the huge piece of fondant and draped it over the cake.  Luckily, a volcano doesn't need to have smooth edges so the draping looked great.  I didn't even worry if there were air bubbles underneath since it didn't matter.
Spraypaint Next, I spray painted the white fondant using Wilton's food color spray; I purchased it at Michael's in the cake decorating department. FYI, when I was spraying the food color, it smelled TERRIBLE.  I mean, totally inedible.  I was really worried that when it dried, the fondant and cake would taste like the horrible smell.  Never fear, the fondant and cake tasted great.  I do have a little voice in the back of my head wondering what in the world is in that stuff and also whether it is really safe to eat.  I fed it to 24 children and plenty of adults so I guess it's fine.  *gulp*
Dry Ice reservoirNext, I cut a hole at the top of the cake and put a styrofoam cup in the hole.  This was to hold the dry ice and warm water.  Plastic or metal cups would work well in this situation.  DO NOT use a glass container as the dry ice would cause it to break.  Not ideal if you actually want to eat the cake!
Creating hard candy lavaTo make the hard candy lava, I melted red jolly ranchers in a 325 degree oven on a baking tray lined with parchment paper.  Melt for 5-10 minutes, checking at 5, 7, 8, and 9 minutes to ensure that the candy doesn't burn.  When the candy is melted, take the tray out of the oven and immediately pick up the parchment paper and drizzle onto foil.  The candy will cool very quickly so drizzle as fast as you can.  I made a few extra lava pieces, just in case one (or several) fell and broke.  I cooled these for a few hours on the foil.  Use a pancake turner to take the candy off the foil.

Icing lava:  I used a whole jar of Wilton's no taste red food coloring to make the red icing for the lava.  I still would have preferred for it to be a little bit more red but it looks ok in the pictures and tasted great so I won't dwell.  I used a small offset spatula to add the lava.  There is no pattern, I added the lava randomly until I ran out.  I only used one batch of icing for the cake layers and the lava.
Placing hard candy lava:  Next, I pushed the lava candy into the fondant and cake and used a little icing to secure it.  I think that if I did this again, I would use a sharp knife to cut the fondant before I pushed the candy into it because the fondant was difficult to pierce and I nearly broke the candy.  
Dry ice:  Our science guy brought the dry ice.  Before I knew that dry ice would be provided, I did research and found that you can purchase it at most major grocery stores.  It comes in different sized blocks and you can break it up using a hammer.  Use protective gloves or oven mitts when handling the dry ice because touching it with bare skin can cause injuries similar to burns from hot water. Alexander got to add the warm water and I provided a funnel so the water would go straight into the cup (and not drip down the fondant or into the cake).  
It was great fun singing to Alexander and watching him try to blow out the 'fire'!

My Mad Scientist Turns 6!

Part 2: The experiments, the food, and the kids

Mr. Bond, the Science Guy was the main event of our party.  He's a very reasonably priced children's entertainer and the bonus part is that he's a real chemist who used to work for the EPA.  He engaged the children for at least an hour and I'm pretty sure that the kids would have enjoyed it for another hour!  The parents that stayed at the party all loved the experiments and the humor.  Fabulous!  I appreciated that the birthday boy was involved in the show and that Mr. Bond tried to let each of the attendees (did I mention that there were 24 kids??) participate.  
Below is Alexander pouring warm water into a bowl of dry ice.  Love the fog effect!
The kids loved it when dishwashing liquid was added to the bowl.  The bubbles started growing and growing.  Alexander's face is priceless!
Charlotte got to hold some of the bubbles.  She was less than impressed although I think much of her hesitation had to do with the large number of attendees at the party.

We all tried to 'drink' the fog and a few were able to blow it back out again through their mouths or even their noses!  I tried and found that it made me feel a bit like I was being suffocated.  Perhaps I inhaled a little too much.  I did not inhale!!

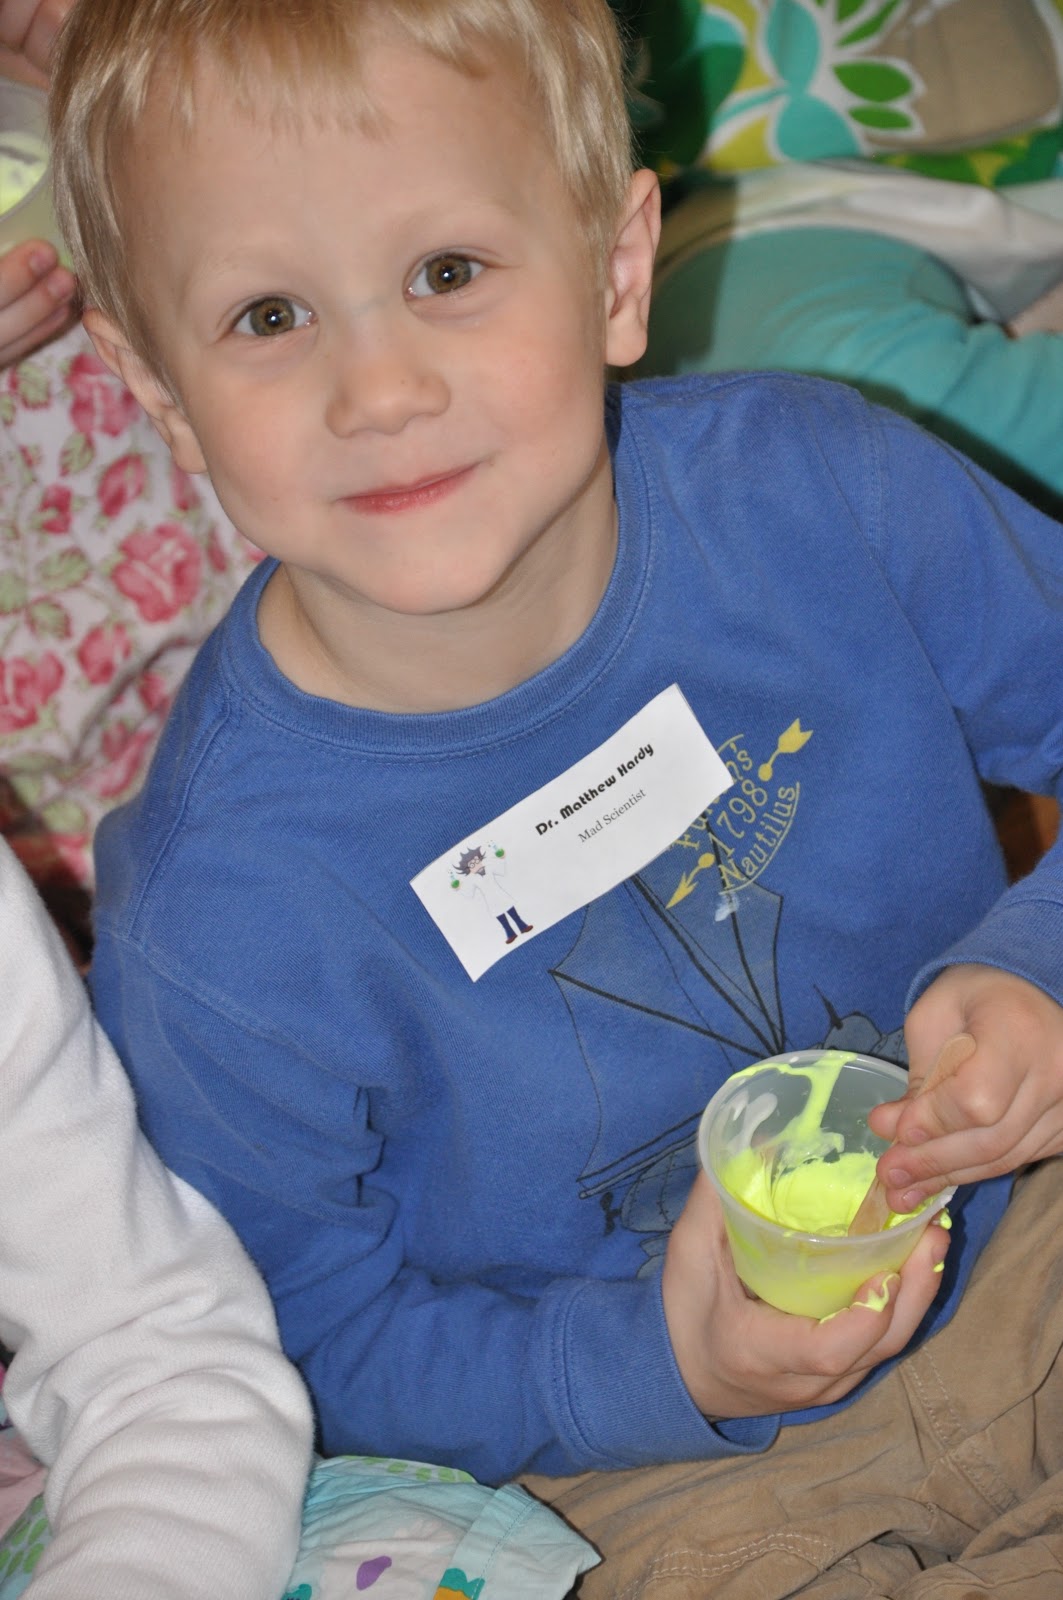
The kids made slime using neon paint, and a few secret ingredients.  They loved getting all messy and watching the slime go from sticky to squishy.  The slime was in little cups that the kids got to take home in their goodie bags

Here's Aunt Michelle trying out the Van de Graaff generator.  Her hair stuck up pretty well but not as well as Charlotte's, who again wasn't too sure...
You probably can't tell but I made blue brain ice cubes.  The kids thought they were cool although the effect wasn't exactly what I had in mind.  We fed the kids pizza for lunch.  No, I didn't make it myself.  I didn't even order it myself.  Thanks, Jon Butler for ordering the pizzas for us!
I really wanted to do some funky snacks for the party and was able to get one of my ideas ready for the kids to enjoy.  Below is a petri dish with an earthworm.  The solution that the  (gummy) worm is in is blue jello.  For the record, Peter made the jello and made my idea happen.  I love how they turned out and the kids liked eating them.  I think Charlotte had two or three dishes!  The gummy worms and petri dishes are from Oriental Trading.


 I'm not sure what Charlotte and her buddy, Thomas, were looking at on the floor and I didn't even take this picture (anyone want to claim it?) but I think it's so cute!

Alexander was spoiled rotten; I couldn't believe all the gifts that he received.  The exciting thing is that most of the presents were things that we could do or build together.  We've already built Lego Starwars, painted dinosaurs, built pirate ships, grown dinosaurs that came out of test tubes and more. I can't imagine that I'll ever be able to top this party!
Please note: I got many of my ideas from blogs online.  Favor and ice cube inspiration from Sew a Straight Line.  She also has some great ideas for experiments that you can do at home or at your own party (if you decide not to take the easy way out like I did). The invitation and the cake ideas, especially the candy lava came from Party Planning Moms.  Grab some free hazard stickers from Living Locurto.

Friday, April 1, 2011

My Mad Scientist turns SIX!

Part 1:  Invitations, decorations, and favors
From an early age, Alexander has been interested in science.  He likes to read children's encyclopedias, especially the pages that pertain to how the world works.  So, what better way to usher in year six than with a Mad Scientist Party.  What a blast!!

Here's the invitation!  It's a shaker card.  There are lots of great tutorials out there on how to make these.  I looked a couple like this one and this one then made a trip to Michael's.  I think the most important tip to remember is to buy the mounting tape; regular double sided tape won't work!

I used Publisher to throw together the inside and printed it on white copy paper.  Peter helped me tape the insides in the cards using double sided tape. (I can't get this photo to turn the right way so just tip your head to the left and enjoy.)
 Favor bags were from a bundle package that I purchased at Michael's and then added a few stickers that I made out of clip art.  Alexander helped me with this part and let me know exactly where each sticker needed to be placed.
 Inside the favor bag, we put mad scientist glasses, a magnifying glass, sticky frogs, (all from Oriental Trading), test tubes with nerds, pop rocks, and glow bracelets.
 I really wanted to show off this fun fabric that I picked up at Textile Fabric's semi-annual sale.  This piece was in the clearance room so it was 75% off.  I plan to make an apron for Alexander using this fabric and some flame fabric that he picked out.

Each child was 'checked in' and given a name tag.  I used clip art and a table in Word to make the name tags.  I printed them on a full sticker sheet and cut them out.
 To decorate the mantle, we used a bunch of the science books that we have (or were given), plus a few fun experiments and science gadgets.
Tune in the the next post to see pictures of our entertainment for the day, Mr. Bond, the science guy.  He was fabulous!  We highly recommend him (and you'll see why)!