Search This Blog

Blogs of friends

Powered by Blogger.

Followers

Showing posts with label recipe. Show all posts

Monday, June 13, 2011

What in the world is that??

That is the question that many people ask when this vegetable arrives with the latest bunch of CSA goodies.  So, in case you're wondering what it is or what you can do with it, I have some ideas!  First, it's called kohlrabi.  Kohlrabi means cabbage turnip in German. It tastes like turnip or the stems of broccoli.  The greens of the plant can be eaten; cut them off right away and store no longer than a few days.  If they're not crisp, they're probably not as good any more.  Store the bulbs in the fridge, unwashed and in a plastic bag.  Tender, young kohlrabi is delicious eaten raw. Peel the outer skin with a paring knife (the skin is really fibrous and tastes yucky, in my opinion). Slice, dice, or grate, and add to salads. Use on raw vegetable platters or serve with a creamy dip. Substitute in recipes calling for radishes. Grated kohlrabi can be added to slaw, but lightly salt it first and let stand for several minutes. Squeeze to remove any excess water before adding dressing. Kohlrabi can also be steamed or boiled. For this preparation don’t peel until after they are cooked. Steam or boil until bulbs are tender, peel skin, and season with butter, salt, and pepper, a cheese sauce, or just enjoy plain.

Ok, so that's the boring info.  Now for the good recipes.  Here's an easy slaw-type recipe for you to test out. This one incorporates beets, carrots, and kohlrabi so you can use up lots of your CSA veggies in one go!  It's incredibly easy and quick to throw together!

I have not yet tried this recipe but I am so excited about it!  I know that Peter will love it because of the ginger that the recipe calls for.  Here's the link to the recipe:  http://straightfromthefarm.net/2007/06/17/something-original/  How could you resist any sort of empanada??

Tuesday, May 24, 2011

CSA Goodness!

Whenever I mention our CSA goodies, I get a lot of questions.  What is CSA?  Do you have to drive all the way to the farm to pick things up?  How do you use all of those strange vegetables?
First, CSA stands for Consumer Supported Agriculture (CSA Explained).  We belong to a CSA through Avalon Acres Farm.  Each week during the spring/summer we receive a box of Tennessee grown produce.  You can also choose to get a meat selection.  This season, we are sharing a full-share of produce with friends and our delivery is taken to Otter Creek Church on Sunday mornings.  There are lots of different delivery options and as of today, you can still sign up for the summer program.  I'd suggest sharing with someone so that you get a bigger variety of veggies to try.  
And, how do I use all of this stuff that we get?  I have to be honest.  There is a big learning curve when it comes to using up the produce.  Last year, I'm pretty sure that I had quite a bit of stuff go to waste because I didn't know what to do with it or just didn't have the patience to figure it out.  I'm trying to start out this year with a bang.  There are so many resources out there to help me identify our veggies and to figure out what in the world to do with them to make them taste fabulous.  Avalon Acres has a recipe blog and a facebook group that are great resources.  It's great for me to break out of the carrot and broccoli rut!  
Last night, I went a little crazy and tried to use up lots of our items in one evening.  I made a cream cheese and radish spread, a recipe that I got from my friend, Carrie.  I made stirfry with chicken, broccoli, and spring onions.  I roasted kohlrabi and beets that I sliced in the shape of fries (gotta trick the kids somehow!).  And for our lifegroup the night before, I made a strawberry cake with strawberry cream cheese icing.  I'm going to include the recipes for the radish spread and strawberry cake because I could eat both of them all day long.  Oh wait, I did eat them.  For breakfast.  Don't tell anyone.  


Radish Spread (Recipe given to me by Carrie)
10 radishes (about 8 ounces)
3 green onions, white and green parts
4 ounces (preferably) or 8 ounces neufchatel (low-fat cream cheese)
Salt & pepper to taste

Whizz all the ingredients in the food processor. Season to taste. Serve & enjoy!


Strawberry Cake with Strawberry Cream Cheese Icing
Cake Ingredients:8 ounces cream cheese, room temp2 1/4 cups cake flour (sifted)
2 1/2 teaspoons baking powder
1 cup butter, room temp (2 sticks)
1 1/4 cups sugar
2 teaspoons strawberry extract (you can use vanilla if you can't find strawberry)
1 cup whole milk, room temp
3 eggs, room temp
3/4 cup hulled, pureed fresh strawberries
1 teaspoon lemon zest
1 teaspoon lemon juice

strawberry cream cheese frosting
1/2 cup butter, room temp (1 stick)
1/2 cup pureed fresh strawberries (or frozen thawed)
1 teaspoon strawberry extract (or vanilla)
3-6 cups confectioners' sugar (powder sugar)

  1. 1. Combine sifted flour and baking powder in a small bowl and set aside. Using a mixer, cream the butter and sugar. Add eggs 1 at a time; mix well after each addition. Next add pureed strawberries and extract and combine well. Gradually add the flour (and baking powder) and the milk alternating between them until completely mixed. Then add lemon zest and juice and mix well.
  2. 2.  Lightly grease and flour a 13 X 9 pan or (2) 8" round pans. Pour batter into pans and bake at 350 degrees for 25 - 30 min or until a toothpick inserted in the middle comes out clean. Cool on a wire rack.  (My cakes fell a little bit when I took them out of the oven but it didn't affect the taste one bit.  In fact, it may have been better. *Suggestion: have your 6 year old help you and you'll probably have flatter cakes too!)
  3. 3.  For the icing : using a mixer, cream the cream cheese and butter until nice and smooth. Add the extract and pureed strawberries. Gradually add the powder sugar until it has the consistency and sweetness you desire.  If it gets too sweet, add a little bit of lemon juice.  I ended up doing this because Peter doesn't like icing to be too sweet.

Tuesday, August 24, 2010

Eggplant Parmesan Lasagna

We've gotten a few eggplants through our CSA and I really wanted to do something yummy with ours. I made eggplant Parmesan lasagna! It turned out so, so good and the family loved it! I can't wait to eat it again for lunch today. I totally forgot to take a picture but you can just use your imagination, right? Imagine a casserole dish with hot, gooey, mozzarella (slightly browned) on top of pan fried eggplant, noodles, and more cheese. I hope you enjoy!!  Recipe adapted from one found on bigoven.com

26 oz pasta sauce (I used homemade but you can use two jars of ready made, if you like
1/4 cup chopped fresh basil (I used a little extra because I like it).
1/2 teaspoon dried crushed red pepper (again a little more)
1/2 cup whipping cream (I told Alexander that there was whipped cream in our dinner.  This made him very keen to try it!!)
1 cup grated Parmesan cheese
1 large eggplant (about 1 1/2 lb.); (I used two smaller ones and it worked out great)
Salt and Pepper
3 large eggs lightly beaten
3 tablespoons water
1 cup all-purpose flour
6 tablespoons olive oil
6 lasagna noodles cooked and drained
1 (15-oz.) container part-skim ricotta cheese
2 cups Mozzarella cheese (8 oz.) shredded
1. Cook first pasta sauce, basil and red pepper over medium-low heat 30 minutes. Remove from heat; stir in cream and Parmesan cheese. Set aside.
2. While the pasta sauce is simmering, peel the eggplant (I used a potato peeler), and cut crosswise into 1/4-inch-thick slices. Lay slices on a cookie sheet or waxed paper.  Sprinkle slices evenly with salt and black pepper. Stir together eggs and 3 Tbsp. water. Dredge (here is a great explanation of dredging, in case you're new to cooking) to eggplant in flour; dip into egg mixture, and dredge again in flour, shaking to remove excess.
3. Cook eggplant, in single layers, in 1 1/2 Tbsp. hot oil in a skillet over medium-high heat 4 minutes on each side or until golden brown and slightly softened. Drain on paper towels. (I had a hard time resisting a little nibble on this bad boys.  Yum.)  Repeat with remaining oil and eggplant, wiping skillet clean after each batch (I used an old tea towel that I got a little wet to wipe out the pan).  
4. Layer 3 lasagna noodles lengthwise in a lightly greased 13- x 9-inch baking dish. Top with one-third tomato sauce mixture and half of eggplant. Dollop half of ricotta cheese evenly on eggplant in dish (my part skim ricotta didn't dollop so I had to spread it on the eggplant but it ended up tasting fabulous anyway); top with half of mozzarella. Repeat layers with remaining noodles, one-third sauce mixture, remaining eggplant, and remaining ricotta. Top with remaining one-third sauce mixture and mozzarella cheese.
5. Bake at 350 for 35 to 40 minutes or until golden brown. Let stand 20 minutes before serving.  Feed to your family and smile a lot while they tell you how good this is!!
Bon appetite!
(P.S. I have been doing some sewing/crafting but am pretty busy with getting consignment sale stuff ready, and I'm getting ready to take a trip to Mexico with Charlotte and my dad.  I'll be out of touch from Friday until the next Saturday but I promise to bring some great pictures back with me!  Stay tuned when I return for photos of the Quiet book that I've been working on! And, check out my inspiration for some great Quiet book ideas:

Tuesday, July 13, 2010

Happy Homemaker

My dad mentioned the other day that I'm turning into quite the little homemaker. I'm really enjoying being at home and discovering all that I can do in my kitchen and dining room (that's where the sewing machine is, currently). Does it all sound a bit old fashioned? Yes, I believe that it does. But it's fun and it makes me happy. So, how can I resist? I'm considering changing the main title of my blog to The Happy Homemaker. I'm sure there's already someone out there using that title but that's ok, right?
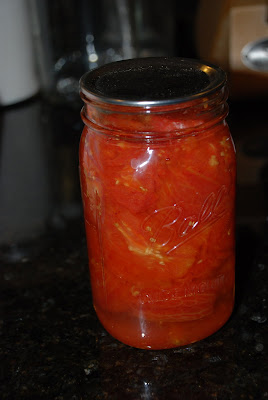
So, in the last week, I have made blackberry jam using the berries from our CSA (and a few extras from the Nashville Farmer's Market); I haven't created a label for the jam yet; does anyone have any ideas of where to get some fun designs or a program that I can use to design my own?Attended a tomato canning party; Thanks, Carrie B. for the invite and the fun. You can check out Carrie's blog for more photos of our work! We had some yummy food; I took some blackberry cobbler that I would definitely make again. Healthy was not on my list while I was baking, but it sure did taste good.
Finished a dress for Charlotte which my friend, Amanda, monogrammed (photos to come at a later date when my model will hold still), and nearly completed a messenger bag using some fun fabric that I purchased at The Children's Corner during their 50% off sale. I love a good fabric sale! A word to the wise about choosing patterns, make sure you read all of the provided information on the back of the pattern before purchasing. I found this great pattern that looked relatively easy, purchased it, cut out the tissue pattern pieces, and cut out my fabric. Then, I read the back of the pattern that stated that I was only supposed to use quilted fabrics for the bag and that there was no lining inside the bag (because quilted fabric would already have a backing/lining). There was nothing that I could do but adapt the pattern to work for me. I created a lining by making a duplicate of the outside of the bag. It turned out pretty well and it will work for carrying around my wallet, a few diapers, and a sippy cup for Charlotte, all staples for when we go out.
The front of the bag. Still hoping to add some sort of clasp/snap/button since the pattern didn't call for it. I'm thinking snap because a button might be annoying when I need to get into the bag quickly. Maybe a snap with a faux button on the top?

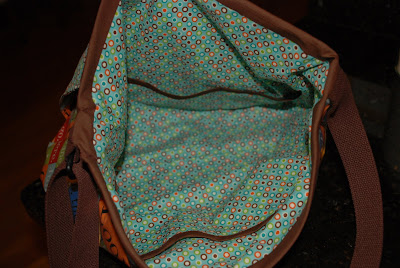
Front of the bagInside of the bag with my made-up lining. It has lots of cute pockets inside but it's hard to get a good picture of those.
The back of the bag. It has two pockets for stuffing used tissues, register receipts, and half-eaten cereal bars. At least the fabric is laminated so I might be able to wipe off the gooiest messes. Maybe I ought to make a NO-GOO rule for my first homemade bag?

I discovered that my red and white Better Homes and Gardens cookbook has lots of fabulous photos for identifying fruits, vegetables, herbs, cheeses, cuts of meat, and more! Wish I had known this back when I was trying to identify all of the greens that we were receiving from the CSA. There's always next year! Thanks to Jessica S. who mentioned that she uses this cookbook for canning information as well. I wouldn't have even gotten it out had she not mentioned it. Seems that our sisters in the 1930s may have known what they were talking about! Also, I made some very yummy, per Peter and the kids, cheesy scalloped potatoes. We've been getting a good number of potatoes from the CSA and I wanted to try a new recipe. I'm so glad that I did. They went very well with edamame and panko encrusted tilapia. (Side note, why does the Blogger spell check not recognize edamame, panko, or tilapia as spelled correctly? Am I that terrible of a speller? Are these words so new that it just doesn't list them yet? Very odd.)

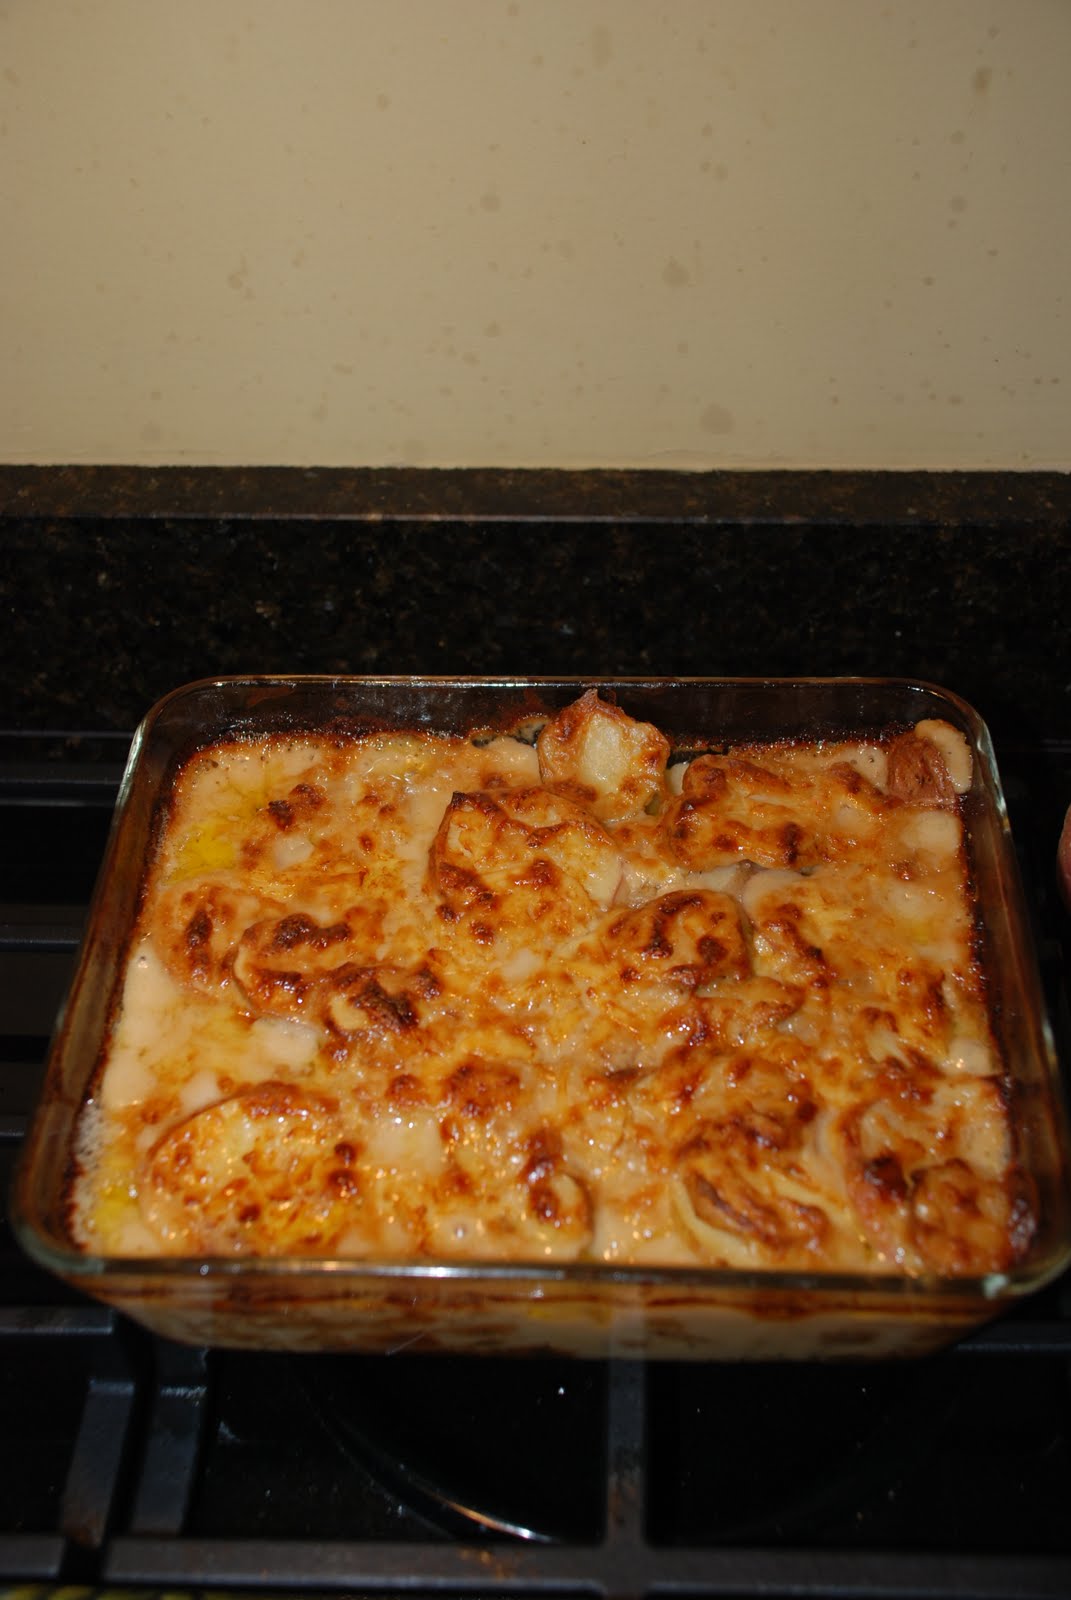
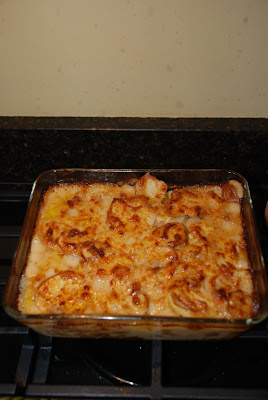
Here's a pic of the potatoes. Pay no attention to the grease spatters on the wall behind the stovetop. Did I mention that the builder of our house, Drees Homes, painted the ENTIRE house in flat paint? My goal in the next six months is to paint the kitchen. Peter doesn't know that yet but I suppose he'll figure it out when he reads this post. If he reads it. I'm not sure if many people are reading but I sure am typing a lot! Here's the recipe for the potatoes from BH&G. Make at your own risk. You'll want to eat all of them in one sitting! (Note: These take 85 minutes to bake so you have to think ahead if you want them for dinner.)
1 cup chopped onion (1 large)
2 cloves garlic, minced
1/4 cup butter
1/4 cup all-purpose flour
1/2 teaspoon salt (I didn't add this)
1/4 teaspoon black pepper
2 1/2 cups milk (I used 2%)
8 cups thinly sliced red, white, long white, or yellow potatoes

1. For sauce, in a medium saucepan cook onion and garlic in hot butter until tender. Stir in flour, salt, and pepper. Add milk all at once. Cook and stir over medium heat until thickened and bubbly. Remove from heat; set aside. Place half the sliced potatoes in a greased 3-quart rectagular dish (mine was only 2.6 qt. and worked fine). Top with half the sauce. Repeat layers.

2. Bake, COVERED, in a 350F oven for 45 minutes. Uncover and bake for 40-50 minutes more or until potato is tender (I checked mine with a fork). Let stand, uncovered, for 10 minutes before serving.

For Cheesy Scalloped Potatoes, which I highly recommend: Prepare as above, except gradually add 1 1/2 cups (6 ounces) shredded cheddar (I used sharp white cheddar), Gruyere, or Swiss cheese to the thickened sauce, stirring until cheese melts. (I reserved a little of the cheese and sprinkled it on top so that we'd have a nice crusty top layer.)

Saturday, May 29, 2010

Soup was a hit!

I am so pleased that the kale and white bean soup was a hit with my kids and hubby. Really, I needn't worry about Peter as he is the best sport and the best eater I've ever met. Every dish that I make, he'll try and doesn't complain. The kids, on the other hand, are a bit more difficult to please. I am happy to report that each and every one of us cleaned our bowls! See below for photos of the finished product and of the kids enjoying it! Yes, that's kale hanging out of Charlotte's mouth!
Kale is yummy, mommy!

Our big project for the weekend is to put together our new swing set, ordered from CedarWorks, a really cool company in Maine. The set is all splinter-free cedar and will never need to be sanded, sealed, or stained! The wood starts out as a pine-looking color and then ages to a silvery-gray. The pieces of the set were delivered on Friday, we had a guy bring in landscape timbers and mulch today, and we begin construction tomorrow. So far, we have one friend coming to help but we're not refusing anyone. Give us a shout if you're bored and we'll put you to work. We'll probably even feed you a meal or two! Had to kill the grass before putting down the mulch!


Also, I've figured out that you can roast radishes! So excited about this and plan to try it on Monday evening. Here's a recipe that sounds easy and yummy!

20 medium radishes, trimmed and cut into fourths (use all red, or a mixture of red and white)
1 1/2 T roasted peanut oil
1-2 T soy sauce (I used about 1 1/2 T)
2 green onions (scallions) sliced thin
1 T sesame seeds, toasted in a dry pan

Preheat oven to 425 F. Wash radishes, trim ends, peel if needed, and cut into same size pieces. I cut the white icicle radishes into diagonal pieces, and the red ones into half or fourths, depending on how big they were. Cut green onions into thin slices.

Toss radishes with peanut oil, then roast about 20 minutes, stirring one or two times. When radishes are tender and starting to brown, remove from oven, toss with soy sauce to coat and mix in green onion slices. Put back in oven and roast about 5 minutes more.

During final five minutes roasting time, put the sesame seed in a dry pan and toast over hot stove for about 2 minutes, or until starting to brown. Remove radishes from oven, place in serving bowl and sprinkle with toasted sesame seeds. Serve hot.

Thursday, May 27, 2010

Kale!??!?!

So I promised that I would post a picture of the veggies that I'm trying to identify. Here ya go:


My 'expert' guess is that this is kale. I'm not 100% sure of my guess but I'm going to go with it because I love my one kale recipe. Sharing it here since I got a request. Even the kids like this one! I can hardly wait until tomorrow night when I get to eat this!! YUMMY! If you make it, let me know what you think! (Thanks to Lisa Baker who introduced me to kale and gave me this recipe.)

CREAMY WHITE BEAN SOUP W/ KALE, GARLIC AND SAUSAGE
8 oz. kielbasa, thinly sliced (I use turkey kielbasa because it seems a little healthier)
1Tbs. olive oil
3 cloves garlic, minced
29 oz of reduced sodium chicken broth (2 cans)
2 cans cannellini beans (or Great Northern beans)
4 cups chopped kale (sometimes I use fresh spinach)
1. Brown kielbasa in large saucepan over med-high heat about 4 mins. Remove from pan.
2. Add oil to pan and cook garlic about a minute. Add broth and bring to a boil. Reduce heat, add beans,
and simmer 5 minutes.
3. Remove 1 cup of soup, including beans, and puree in blender until smooth. Stir bean puree, cooked sausage,
and chopped kale into soup and simmer until kale is tender, about 5-7 mins.
Makes 6 1/2 cups (4 servings)